Introduction
Microchipping is an easy, safe way to improve pet identification and help lost dogs reunite with their owners. A microchip is a small computer chip enclosed in glass that is implanted under a pet’s skin by a veterinarian. Each chip has a unique identification number that can be scanned at animal shelters and veterinary offices to access a pet’s registration information.
Keeping your pet’s microchip information up-to-date is crucial whenever there is a change in ownership. Transferring the registration to the new owner ensures they can be contacted if the pet is lost. Failing to update this info could result in an lost dog being unable to be reunited with the new owner.
This article will provide a step-by-step guide on how to properly transfer ownership of a microchipped dog. We will cover checking the current microchip details, gathering the required documentation, completing the transfer form, updating contact info, transferring in-person at the vet, additional transfer methods, and tips for new owners.
Check the Current Microchip Information
Before transferring ownership, it is crucial to verify the dog’s current microchip information. This ensures you have the correct microchip number and confirms who the registered owner is.
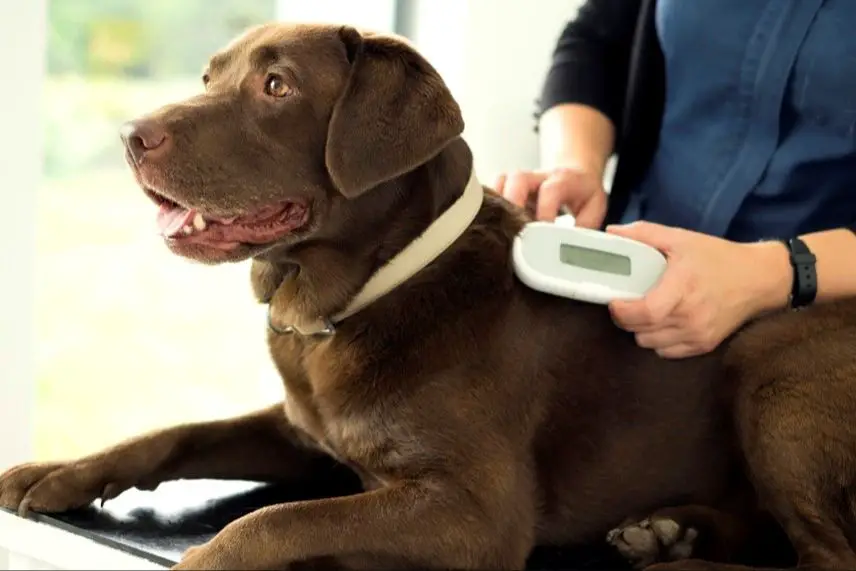
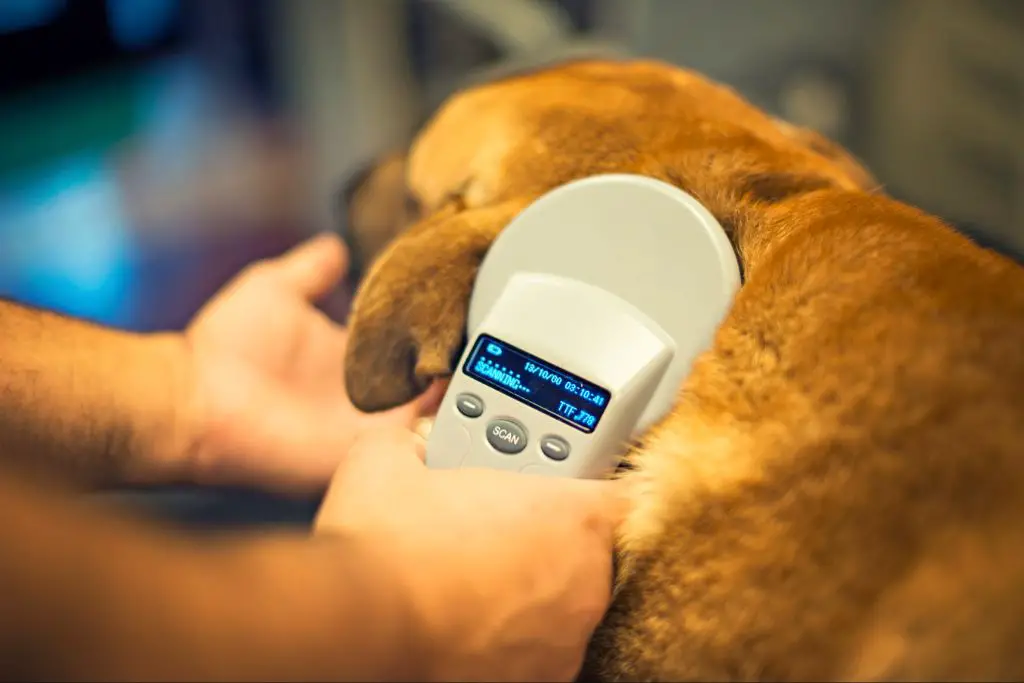
To check the dog’s microchip, you will need a microchip scanner. Most veterinary clinics will scan the dog for free. Place the scanner along the dog’s shoulder blades or neck area. The scanner will display the dog’s 15-digit microchip number if detected.
Once you have the microchip number, contact the major microchip registries to identify where the dog is registered. The largest registries are AKC Reunite, HomeAgain, and Avid. Provide the microchip number and they will look up the registered owner information for you.
AKC Reunite and HomeAgain have online databases you can check yourself. Avid requires contacting them by phone or email to request a lookup. Checking all three registries covers the major companies and helps avoid any issues if the chip was registered incorrectly.
Confirming the registered owner is a critical step. You want to ensure you are communicating with the proper person to transfer ownership before proceeding.
Gather Necessary Documentation
Completing an official microchip ownership transfer requires gathering specific documentation ahead of time. This ensures you have all the necessary paperwork to provide to the microchip registry, vet, shelter or rescue when transferring the registration. The key documents you’ll need include:
- Owner’s photo ID – Both the current and new owner should provide a photo ID like a driver’s license or passport. This verifies identity and proves ownership.
- Proof of ownership/adoption papers – Provide documentation like previous vet records, purchase/adoption contracts or registration forms showing you obtained the dog legally.
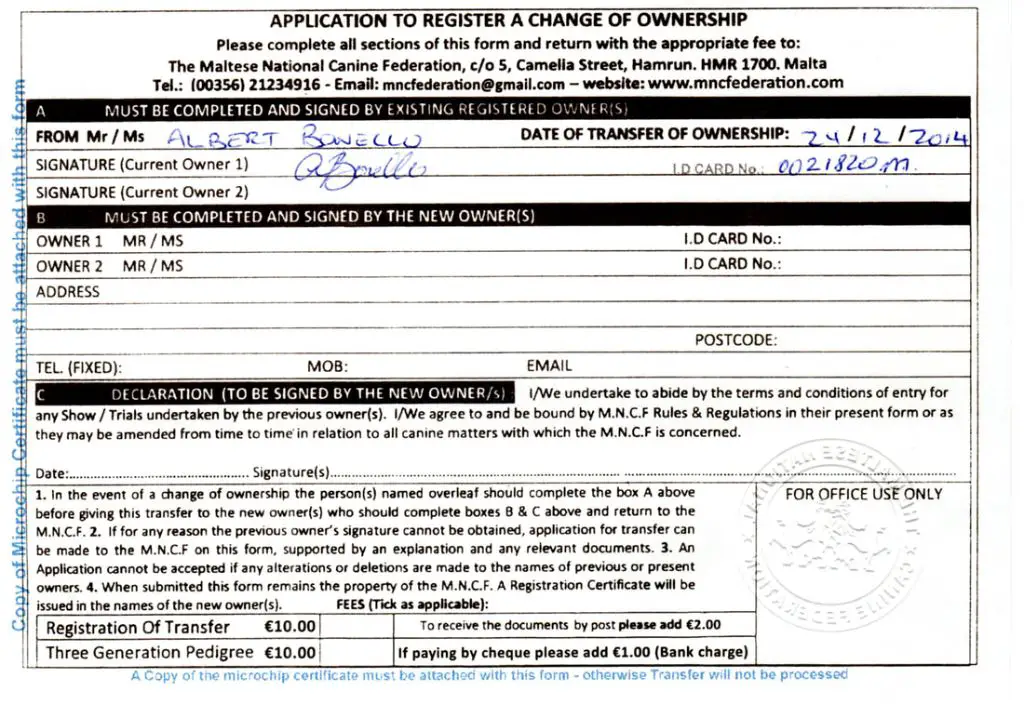
- Microchip transfer form – The registry website provides official transfer forms to submit. This authorizes the ownership change in writing.
- Adoption contract – For shelters/rescues, the adoption contract or agreement states you accept ownership responsibility for the pet.
Having these documents ready in advance will help facilitate a smooth microchip transfer process.
Complete the Microchip Transfer Form
The next step is to complete the microchip transfer form with the registry your dog is registered with. The major registries in the US are AVID, HomeAgain, and 24PetWatch. Each registry has its own transfer form that must be filled out.
The form will require you to provide details like the microchip number, current registered owner name and contact information, new owner name and contact information, and the dog’s information like name and date of birth. There is typically no fee to transfer microchip ownership.
It is crucial that you enter the contact information for both owners correctly so the registry can confirm the transfer request with the current owner and update the registration to the new owner. Not providing accurate contact data can delay the transfer process.
Update Registration Contact Info
Once you have access to the microchip registry account, you’ll need to update the contact information so you receive any notifications. Here are the steps to change the contact info:
- Log into the registry website and go to your profile or account page. There should be a section to manage your contact details.
- Edit your name, phone number, email address, and physical address. Make sure everything is current and spelled correctly.
- For email and phone, check that you can receive messages at the new contact info. The registry may send a verification code.
- Double check that the new owner’s name is listed as the primary contact. Remove any old owner info.
- Save your updated contact details. You may get a confirmation message.
Following these steps ensures you’ll get alerts if your dog ever goes missing and the microchip is scanned. So it’s crucial to keep your info current with the pet registry after a change in ownership.
Transfer In Person at the Vet
Another way to complete the microchip ownership transfer is to visit your vet clinic and have them handle the process. Here are the steps involved when transferring a microchipped pet’s registration at the vet:
First, you’ll need to bring the pet in question to the vet clinic along with the completed transfer form and a copy of the bill of sale or adoption papers. Inform the staff that you need to transfer the microchip registration.
The vet or a technician will use a universal microchip scanner to read and verify the pet’s chip number. They will check that the information matches what is listed on the transfer form and other documentation.
With you present, the vet staff will then access the microchip company’s online database or call their customer service. They will follow the company’s procedure to switch the registered owner and contact information over to you, the new owner.
Most vets charge an additional service fee for facilitating pet microchip transfers. This is typically $15-30 on top of the regular exam or office visit fee. So be prepared for these extra costs when having the vet handle your microchip transfer.
Completing the transfer at the vet clinic provides you with professional assistance as well as an additional form of verification. It also gives you peace of mind knowing your pet’s microchip is correctly linked to your ownership information.
Alternatives To Transferring
If you are unable to complete the transfer of ownership for any reason, there are a few alternatives to consider:
Many microchip registries allow you to add a co-registration or secondary contact to the microchip record. This would allow the new owner to be contacted if the pet goes missing, while still keeping the original owner registered as well.
Another option is to get the pet implanted with a new microchip, registered to the new owner. Some vets recommend getting a second microchip even during an ownership transfer, in case issues arise with the original chip. The new owner would then register the new microchip and become the primary contact.
As a last resort, if the original owner is completely unavailable or unwilling to sign transfer papers, the new owner may have to register the microchip to themselves without the proper transfer documents. This would likely still allow them to be contacted if the pet goes missing. However, it could cause issues if the original owner ever contested their ownership.
Ultimately, properly completing the transfer process is ideal. But if that is impossible, these alternatives allow the new owner to take over care and still have registration on the pet’s microchip.
Importance of Following Through
It’s crucial that new dog owners complete the microchip ownership transfer process instead of putting it off or forgetting about it. Failure to update the registration information can have serious consequences if the dog ever gets lost or separated from the new owner.
If the microchip data is not updated, the dog may accidentally end up being returned to the previous owner instead of the new rightful owner if scanned during a lost pet search. Even if the chip company contacts the new owner as an alternate contact, there could still be complicated disputes over legal ownership.
In addition, incorrect microchip information can hinder efforts to get a lost dog necessary medical treatment. Veterinarians scan microchips on injured animals to obtain owner contact details and authorization for treatment. With outdated registration data, a vet may not be able to reach the current owner and provide the urgent care needed.
That’s why properly transferring microchip ownership is so important. Taking the time to follow through with the transfer process can prevent heartache and headaches if a dog ever finds itself lost or in need of care. It’s a small but critical step all responsible new pet owners should complete.
Tips for New Owners
Once you’ve completed the transfer process, here are some additional tips for new dog owners:
Let your vet know ownership has changed – At your dog’s next vet appointment, inform staff that you are the new owner. This ensures their records are updated accurately.
Get tags and licenses changed over – Make sure your contact info and ownership is reflected on your dog’s ID tags and municipal license. Update the city/town license first, then order a new tag.
Notify contacts/rescues/shelters of the change – If your dog was adopted from a rescue or shelter, let them know you are now the owner. Also inform any emergency contacts or microchip registries that you are the new primary contact.
Taking these extra steps helps ensure a smooth transition and keeps all important records up-to-date on your new furry friend!
Conclusion
Transferring the microchip registration for your newly adopted dog is a crucial step to ensure you are listed as the official owner. In this article, we covered the key steps involved in updating the microchip information, including checking the current registration details, gathering necessary documentation, completing the transfer form, updating contact information, and visiting your vet to finalize the transfer.
It’s important to follow through with officially transferring the microchip registration, even though it involves some paperwork and effort. As the new owner, you want to make sure you can be contacted if your dog ever gets lost. Accurate microchip information greatly increases the chances your dog will be safely returned if separated from you.
For additional guidance on transferring microchip ownership, consult your vet, local animal shelter, or pet microchip company. Their staff can explain the specific requirements in your area and ensure the process goes smoothly. With the proper preparation, you’ll have peace of mind knowing you are officially registered as your adopted dog’s owner.