Introduction
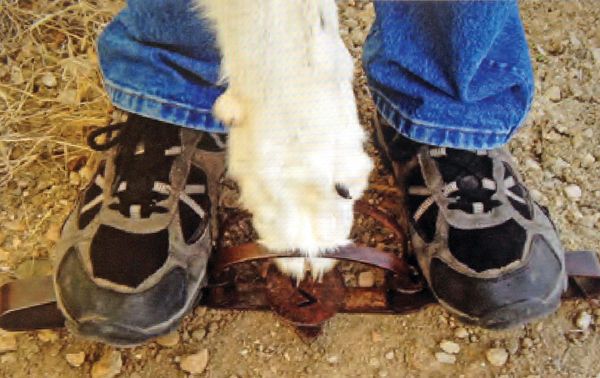
Dog proof traps are a special type of trap designed to catch animals like raccoons, opossums, and skunks while avoiding accidental capture of dogs or cats. They work by having an enclosed triggering mechanism that requires the animal to reach inside with their paw or nose to trigger the trap, something dogs and cats are unlikely to do. Homeowners often use dog proof traps as a humane way to remove nuisance wildlife from their property without harming any pets in the process.
Pros of Painting Traps
One potential advantage of painting dog proof traps is for aesthetic purposes. Painting traps allows them to blend in better with landscaping features like fences, rocks, trees, etc. This can help the traps be less visually intrusive for homeowners and their guests. For example, painting traps dark green or brown can help them blend in with vegetation. Painting them grey can help them look like rocks or concrete. This allows traps to do their job while not detracting from the look of the yard.
As one forum user commented, “Only reason to paint them is to keep them from rusting up in the off season. The first coon you catch will polish off all the paint anyway.” (Source)
Cons of Painting Traps
While painting traps can help prevent rust, there are some drawbacks to consider:
Paint can interfere with the trap mechanism and prevent it from working properly. As the trap opens and closes, the paint can chip and peel, leaving flakes inside the trap. This can jam up the action and prevent the trap from closing all the way.1
The paint can also wear off over time with use, requiring more regular maintenance and re-painting. As animals like raccoons interact with the trap, their claws and teeth will scratch off the paint. Exposure to sun, rain, snow, and temperature changes will also cause the paint to deteriorate.2
Some trappers argue that freshly painted traps can leave more of a scent and be more noticeable to animals. It’s recommended to let painted traps sit outside for a while before use so any strong paint odor can dissipate.
Overall, paint can require tedious upkeep to maintain traps and runs the risk of interfering with the finely tuned trap mechanism. Trappers should weigh the benefits of rust prevention against potential drawbacks of painting.
Trap Placement
When placing traps, it’s important to avoid areas that dogs frequent or have access to. Traps should not be placed anywhere your dog normally walks, plays, eats or sleeps. Avoid placing traps along fence lines, near dog houses, under decks, or anywhere your dog spends a lot of time.
Proper trap placement technique is crucial. Traps should be placed along walls, flush with the ground, and tucked into corners or concealed areas. Look for areas with dog signs like urine or feces marking. Place traps perpendicular to the wall with the opening facing the wall. This allows the trap to close when a dog enters it while investigating the area.
Traps placed randomly in open areas are less effective. Dogs need a reason to investigate the trap, like a wall or tight space. Make sure traps are stable and won’t move once placed. Using securing stakes or weighing down the trap can help prevent it from shifting once a dog steps inside.
Trap Maintenance
Proper trap maintenance is essential for effective trapping. Traps should be checked regularly and reset when needed. It’s important to remove any dirt, debris, or rust and ensure the trap is in good working order. Trappers recommend scrubbing traps with a wire brush and wiping down with an oily rag to prevent rusting. For traps with moving parts, a light oil or grease should be applied to prevent seizing up. When resetting, check the pan tension and make any adjustments for proper sensitivity. Well-maintained traps are more effective at catching and holding animals. Keeping traps in good working order through regular cleaning and maintenance makes for better trapping results.
According to the Missouri Whitetails forum (https://www.missouriwhitetails.com/threads/dog-proof-trap-prep.119994/), trappers recommend using a wire brush to remove any rust on traps before the season starts. Proper cleaning and storage helps prevent rusting and seizing of parts.
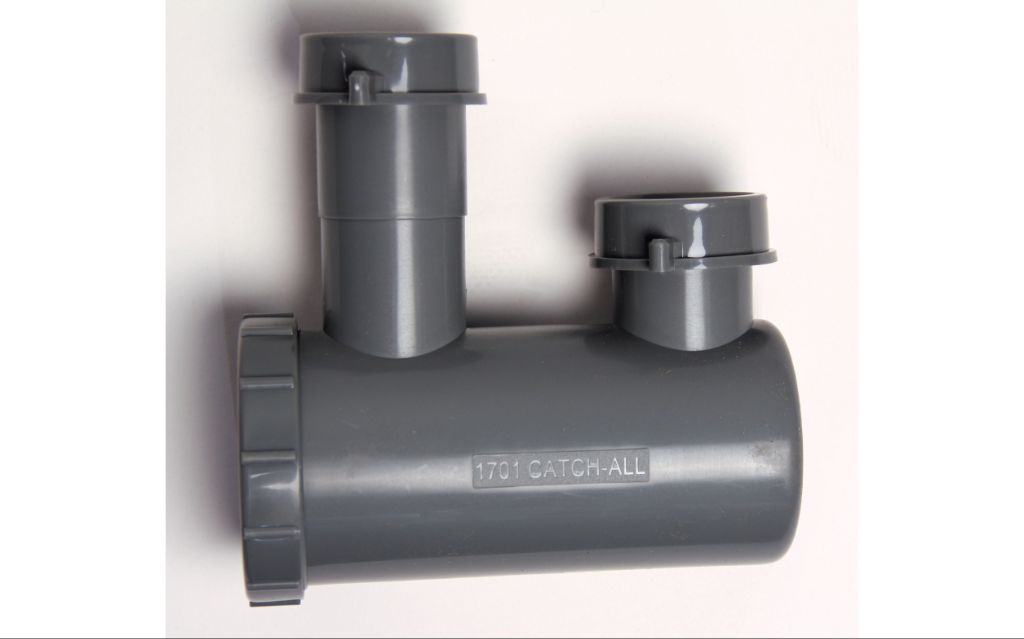
Trap Materials
The most common materials used for dog traps are metal and plastic. Both have their own unique pros and cons to consider.
Metal traps are typically very durable and sturdy. They can withstand chewing and weather elements. However, they can be heavy, prone to rusting, and potentially hazardous if sharp edges are exposed. Common metals used include steel, aluminum and galvanized steel.
Plastic traps are usually lighter weight and cheaper than metal. They won’t rust. However, plastics are generally more susceptible to damage from chewing, UV rays, and extreme temperatures. Thermoplastics like ABS and polycarbonate tend to be more durable types of plastic for traps.
There are also biodegradable or eco-friendly trap materials emerging, often made of natural fibers or recycled materials. These sustainable options degrade without harming the environment. Just keep in mind they may not be as sturdy and weather-resistant as metal or plastic.
When selecting a trap material, consider factors like safety, durability, weight, cost, weather resistance, sustainability, and chemical resistance. The optimal material depends on your specific needs and situation.
Trap Designs
There are a few main types of trap door designs used for dog-proof raccoon traps. The most common is a trigger pan that causes the door to shut when pressure is applied by the raccoon’s paw (Faler, 2019). This trigger pan is connected to the door by a mechanical lever system that snaps the door shut quickly when triggered.
Another design is a gravity drop door, where the door is held open slightly and drops down by force of gravity when the trigger pan is activated (Sandusky Register, 2023). The trigger pans in these traps may be more sensitive since they don’t require as much force to drop the door.
Some traps also use spring-loaded doors that slam shut with much greater force compared to gravity drop doors. The springs provide rapid closure to help prevent escapes or bait theft.
Trap doors typically have rounded, smooth edges to avoid injuring animals. The ideal is for the door to securely trap the raccoon without harm until it can be humanely dispatched or relocated.
Paint Types
When choosing a paint for traps, durability is a key consideration. The paint needs to be able to withstand repeat immersions in water, temperature fluctuations, and general wear and tear without chipping or peeling away.
Oil-based enamel paints like Rustoleum provide good durability for traps. The oil helps the paint adhere tightly to the metal and form a protective coat (source). Latex paints are not recommended as they can chip and peel more easily when immersed repeatedly.
Proper preparation is important for good paint adhesion. The trap should be clean and free of dirt, oil, and loose rust. Lightly sanding provides an ideal surface for the paint to grip (source). Wiping down with alcohol removes any residual oils.
Allowing painted traps to air dry for a couple weeks helps fully cure and harden the paint before use. Proper curing prevents peeling or rubbing off during setting.
Painting Process
When painting dog proof traps, follow these step-by-step instructions for best results:
1. Start by gathering your supplies – dog proof traps, wire brush, sandpaper, primer, paint, disposable gloves, and paintbrushes. Make sure to use a wire brush to remove any dirt, debris, or rust from the traps beforehand.
2. Lightly sand the traps with fine grit sandpaper to rough up the surface so the paint adheres better. Wipe off any dust.
3. Apply a thin coat of metal primer, making sure to cover all surfaces of the trap. Allow the primer to fully dry as per the instructions.
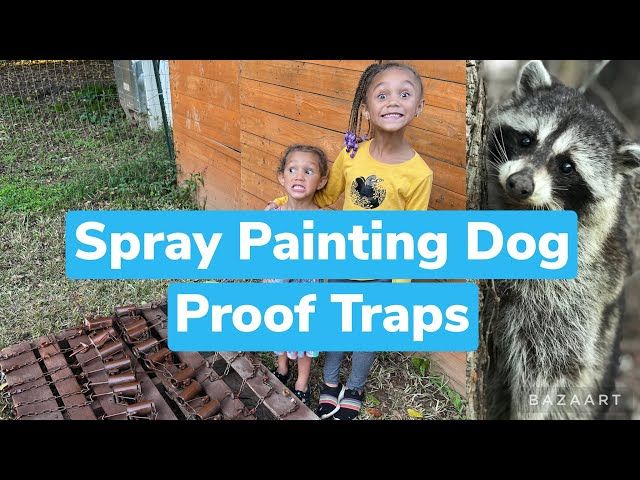
4. Once primed, start painting the traps using long, even brushstrokes. Apply 2-3 thin coats of spray paint to build up coverage, allowing each coat to dry in between. The spray paint will provide a smoother finish versus brushed on paint.
5. For best durability, use a high quality enamel spray paint designed for metal surfaces. Testors brand spray paint for model kits works very well for this application.
6. Allow the painted traps to cure for 24 hours before use for maximum hardness and adhesion of the paint. Be patient and avoid handling them too soon.
7. Store unused painted traps in a dry location to prevent any chipping or damage to the finish.
With proper preparation, primer, and paint selection, your traps will have a durable and uniform finish that will help preserve and protect them for seasons to come.
Conclusion
In summary, there are valid reasons both for and against painting dog proof traps. The main benefits are that painted traps are more visible, blend in better aesthetically, and may last longer against the elements. The downsides are that paint could make traps slippery, interfere with functioning, and require more maintenance.
Ultimately, painting traps comes down to personal preference. If opting to paint, use high quality exterior paint in natural earth tones for maximum durability and discreetness. Properly prep and clean traps beforehand. Position and maintain traps diligently whether painted or plain metal.
When in doubt, check with the trap manufacturer or leave unpainted. The most important factors are installing traps correctly and checking them regularly to keep pets safe. With proper precautions, painted traps can be an option for those wanting added visibility or aesthetic cohesion on their properties. Plain metal traps also remain a tried and true choice.
